10/1/2014 – Updated compilation instruction for the MSP Debug Stack
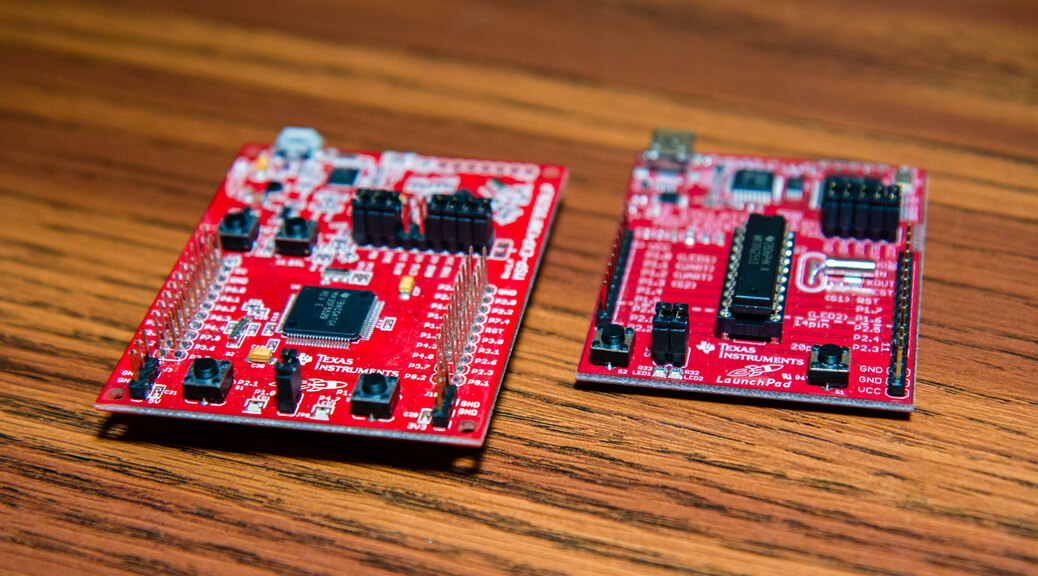
My semester project for CS5204 Operating Systems was to get TinyOS running on some unsupported MSP430 chips. While there are some resources out on the interwebs on how to get TinyOS running on specific hardware platforms, these platforms are designed with hardware for a specific use cases (ex. telos/micaz). What I wanted to do was to get TinyOS running on a generic development platform, or specifically on the TI Launchpads. There are two versions of the Launchpads in circulation: a value line that uses the MSP430G2xxx line of microcontrollers and a higher end board that uses the MSP430F5529 microcontroller. Here I’ll detail the process of setting up a TinyOS programming environment for both TI Launchpad platforms. I’ll also give a brief overview of TinyOS’s architecture.
TinyOS Primer
First of all, what is TinyOS and why use it? From its FAQ: “TinyOS is an open-source operating system designed for low-power wireless devices, such a sensor networks, ubiquitous computing, personal area networks, smart buildings and smart meters. TinyOS provides useful software abstractions of the underlying device hardware: for example, TinyOS can present a flash storage chip, which has blocks and sectors with certain erase/write properties, as a simple abstraction of a circular log. Providing useful, well-designed and heavily tested software abstractions greatly simplifies the job of application and system developers. TinyOS is especially useful for microcontroller-based devices that have sensors and/or networking capabilities. It’s been designed for very resource-constrained devices, such as microcontrollers with a few kB of RAM and a few tens of kB of code space. It’s also been designed for devices that need to be very low power.”
Unlike platforms such as the Arduino, TinyOS was designed with a two major features in mind: low power operation and extensive support for networking protocols. To achieve these design goals, the core of TinyOS is completely non-blocking. As such, everything that runs on the processor originates as asynchronous tasks that can call callback functions upon completion. While the processor is idle, the OS automatically enters the lowest possible sleep state available. Because of this non-blocking design, programming for TinyOS can take a while to get used to.
Abstractions are extensively used in TinyOS to provide code re-usability and portability between various platforms and microcontrollers. Programs are built out of software components, some of which present hardware abstractions while others abstract higher level concepts such as networking protocols, etc. These components are then interconnected through the use of pre-defined interfaces. Combined, interfaces and components allows abstractions of common services, such as packet communication, routing, sensing, actuation, and storage.
Since TinyOS was originally designed for sensor networks, there also exists extensive support for networking protocols such as FTSP and CTP, along with various algorithms such as Trickle and Deluge. In terms of hardware, TinyOS has built in support for a variety of radio chips including the ChipCon CC1000, CC2420, CC2500, Infineon TDA5250, Atmel RF212, Atmel RF230, Semtech XE1205, and more. In order to support these abstractions, the base code of TinyOS is programmed using nesC, a new(er) C dialect that is being developed alongside of TinyOS.
A sample Led component written in nesC is shown below. As you may guess from the code, this component uses the interface Gpio and provides and implements the interface LedControl. We’ll go into more details on how these abstractions are structured and organised later on when we examine the basic Blink program.
|
1 2 3 4 5 6 7 8 9 10 11 12 13 14 |
configuration Led { provides { interface LedControl; } uses { interface Gpio; } } implementation { command void LedControl.turnOn() { call Gpio.set(); } command void LedControl.turnOff() { call Gpio.clear(); } } |
Installing TinyOS
Here I’ll list the steps required in creating a developing environment for TinyOS on the TI Launchpads. For reference, I used a new installation of Linux Mint 15 x64 (Ubuntu 13.04) in a virtual machine. After fully updating the system, there are two ways of setting up the development environment. The first one is an automated process that uses a setup script bundled with the third party extension that we are going to be using. The second method involves installing the development tools individually.
Automated Installation
To install the msp430 toolchain, we can grab it from the main Ubuntu repository:
|
1 |
sudo aptitude install binutils-msp430 gcc-msp430 msp430-libc msp430mcu mspdebug |
To automatically install TinyOS and the extension, follow the instructions here. For the lazy, run the following:
|
1 2 3 4 5 |
mkdir -p somewhere/build cd somewhere/build git clone https://code.google.com/p/tinyos-msp430.scripts-tinyos/ scripts-tinyos-msp430 ./scripts-tinyos-msp430/toolchain.sh ./scripts-tinyos-msp430/toolchain.sh cleanup |
Note that to successfully run this script, you’ll need to install the following packages:
|
1 |
sudo aptitude install git stow subversion build-essential automake autoconf openjdk-6-jdk libusb-dev libreadline-dev |
The script is set up to install TinyOS a to a directory specified in scripts-tinyos-msp430/config.subr. TinyOS is set to install to /opt/tinyos by default so we’ll go ahead and use it as is. Binary files for nesC are found in /opt/tinyos/bin. If you get a stow error at the end of the first script, you’ll need to unstow then restow the directories:
|
1 2 3 |
cd /opt/tinyos/sources/stow sudo stow -D -t /opt/tinyos/root/ tinyos-2.1.2 sudo stow -S -t /opt/tinyos/root/ * |
Afterwards, both TinyOS and the third party extension will be combined by stow into /opt/tinyos/root. Before running any programs in the toolchain, run the following to set up required environmental variables (or put it in your .bashrc):
|
1 |
source /opt/tinyos/scripts/envsetup.subr |
If the steps above complete successfully, you should be good to go.
Manual Installation
Alternatively you can build nesC and TinyOS for other platforms by following the instructions here: Installing TinyOS. If you do so using this method, you’ll have to download the third party extension separately and manually create the stow hierarchy.
Quick primer on the Stow utility
Stow is a utility for combining folders through the use of symbolic links. The program works by linking a number of source folders into a target folder. The target folder then contains all the files and folders that are located in each of the source folders. Overlapping files with identical names will cause the stow program to error out. Note that while you can overlap folders, any files that are created in the target folder MUST be in a directory that was originally unique to any of the source folders. Otherwise the utility doesn’t know which source folder the file belongs to!
To combine source folders into a target folder: stow -S -t <target folder> <source folder>
To separate source folders from the target folder: stow -D -t <target folder> <source folder>
Refer to the man pages for more information.
Programming a Launchpad
Programming for the value line launchpad with the msp430g2553 microcontroller is relatively straightforward. In Linux, you simply compile your program into a binary file before running mspdebug to transfer the binary file to the microcontroller. The emulator on this board is called the MSP-FET430 Flash Emulation Tool (FET) and provides a serial connection to a computer typically over /dev/ttyACM0 or /dev/ttyACM1. When calling the compiler, you typically specify the device so that it includes the correct device header file. The mspdebug program can be used for not only programming but also to step through the program and view register contents.
|
1 2 |
msp430-gcc -mmcu=msp430g2553 -o <output>.elf <program>.c mspdebug rf2500 'prog <output>.elf' |
In Linux, you may have to explicitly set permissions to allow mspdebug to allow access to the serial port. To do so add the following line to /etc/udev/rules.d/46-TI_launchpad.rules :
|
1 |
Add ATTRS{idVendor}=="0451", ATTRS{idProduct}=="f432", MODE="0660", GROUP="plugdev" |
Programming for the higher end launchpad though required a bit more set up as it uses a different emulator. Called the EZ-FET, this emulator requires a unprovided DLL for interfacing. Under Windows, this file (MSP430.DLL) can be found here: MSP Debug Stack. For Linux however, we’re going to have to compile one for our system. Download the source code from here: MSPDS Open Source Package and extract it into a folder somewhere. If you try to compile it straight away though, it won’t work as it’ll complain with an hidapi error. To fix this, we’re going to have to compile the hidapi library required for MSPDS. To do so, we need to install some extra libraries:
|
1 |
sudo aptitude install libboost-dev libtool libudev-dev libusb-1.0-0-dev libboost-dev |
Once the libraries are installed, first download and extract hidapi-0.7.0, then modify hidapi-0.7.0/linux/Makefile and add the flags -pthread and -fPIC to the compiler flags (CFLAGS/CXXFLAGS). Afterwards run make to build the required hidapi library. Once the library is compiled, copy hidapi-0.7.0/hidapi/hidapi.h to ThirdParty/include and hidapi-0.7.0/linux/hid-libusb.o to ThirdParty/lib in the extracted MSP Debug Stack directory. Once these two files are copied, run the following to build and install the library file:
|
1 |
make && sudo make install |
Once this is done, you can transfer the generated binary file to the board by calling the following:
|
1 |
mspdebug tilib 'prog <output>.elf' |
Directory Structure
 The directory structure of TinyOS is shown on the right. If you download and extract the latest version of TinyOS (2.1.2 as of this post), you’ll see that support for many chips and platforms already exists. Not supported however, are the MSP430G2274 and MSP430F5529 chips that are used in the TI Launchpads. We’ll get to it later on, but we’re going to need to add support in for these chips.
The organizational structure of TinyOS is interesting in that it separates the chips from the platforms. Each chip is defined separately as package of components, and a platform is structured to include a number of chips. TinyOS uses the make utility to organize, compile, and program a platform. To make it easier on the end user, an <uC>.rules file is specified in /tos/support/make for each microcontroller family along with an <X>.target file for each platform that points to its corresponding <uC>.rules file. The user then only needs to execute make <X> install to compile and program the <X> platform.
Aside from the <uC>.rules and <X>.target files, each platform also has a few files that must exist in platform <X>‘s directory. These mandatory files include .platform which defines what chips are part of the platform, hardware.h which specifies extraneous defines, PlatformC.nc which is the top-level initialization component, and McuSleepC.nc which implement the power management features of the microcontroller.
Components and Interfaces
The file naming convention in TinyOS can be a bit hard to grasp. A typical component can typically have anywhere from two to four files: Foo.nc specifies the interface, Foo.h is the header file, FooC.nc is the public module, and FooP.nc is the private module. The interface provides a list of commands and events, where the commands are callable functions and events are callback functions. The header file is used to specify a few hard-coded compile time defines. The public module is a component that links together other components (through interfaces) and its own functionality (in its private module). To get a better understanding, lets look at the basic Blink program.
Sample Program: Blink
The blink program has two high level (user) files: BlinkAppC.nc and BlinkC.nc.
|
1 2 3 4 5 6 7 8 9 10 11 12 13 |
configuration BlinkAppC { } implementation { components MainC, BlinkC, LedsC; components new Timer16MilliC() as Timer0; components new Timer16MilliC() as Timer1; BlinkC.Boot -> MainC.Boot; // BlinkC.Boot -> MainC; BlinkC.Timer0 -> Timer0.Timer16; BlinkC.Timer1 -> Timer1.Timer16; BlinkC.Leds -> LedsC.Leds; } |
As the configuration for the top level module, BlinkAppC does not use or implement any interfaces. Instead it simply provides the instructions to connect a number of sub-components together. At the start of the implementation section, the configuration declares all the components that it uses. The components on the first line are singletons, while the timers are generic components which allow for multiple instances. The latter part of the configuration specifies how the components are interconnected. For example, the BlinkC module uses the Boot interface which calls the callback booted() after the device is started. It is up to the module that uses this interface to implement the callback function. This interface is implemented by MainC, and nesC allows for the interconnection to be defined using an arrow pointing from the interface to the implementation. By default nesC tries to bind to the interface with the same name, thus line 7 could be replaced by line 8 with no change in meaning.
|
1 2 3 4 5 6 7 8 9 10 11 12 13 14 15 16 17 |
module BlinkC @safe() { uses interface Timer16<TMilli> as Timer0; uses interface Timer16<TMilli> as Timer1; uses interface Leds; uses interface Boot; } implementation { event void Boot.booted() { call Timer0.startPeriodic( 1000 ); call Timer1.startPeriodic( 2000) ; } event void Timer0.fired() { call Leds.led0Toggle(); } event void Timer1.fired() { call Leds.led1Toggle(); } } |
BlinkC is a private module that only interacts with other components through its declared interfaces. In this case, BlinkC uses two generic timers, the Leds component, and the Boot component. Once the device is started, the main event handler will call the callback Boot.booted(), which is implemented by this module. In this initialization code, BlinkC can use the interfaces without needing to know how the interfaces are implemented in the underlying platform. It simply knows though the interface definition that it can provide a callback function that gets executed once the device is booted. This abstraction through the use of components is what gives TinyOS its power and flexibility. Aside from the booted() callback, this module also implements two other callbacks, one for each timer. Within each timer callback, the module simply calls a function through the Leds interface.
For a more in-depth/alternate explanation of the Blink program, refer to the TinyOS tutorials here.
Here is a component hierarchy map that I made for the basic Blink program. As this program is pretty basic, there are only three main parts: required processor and TinyOS components; LED and general I/O components; and timer abstractions. Adding in other complex peripherals such as the UCSI (Universal Serial Communication Interface) would easily double if not triple the size of this map.

As it can be seen from the diagram, the Blink program calls the Boot interface that is implemented by RealMainP. This module then calls the actual platform configuration PlatformC which we’ll examine in the following section.
Blink on the Msp430G2553 without TinyOS
How would this code look if we didn’t implement it through TinyOS? As you can see from the code below, TinyOS abstracts away pretty much everything. Through such abstractions, the code becomes much easier to understand as long as the user is familiar with nesC and the abstraction structure.
|
1 2 3 4 5 6 7 8 9 10 11 12 13 14 15 16 17 18 19 20 21 22 23 24 25 26 27 28 29 30 31 32 33 34 35 36 37 38 39 40 41 42 43 44 45 46 47 48 49 |
#include <msp430.h> int main(void) { // Disable watchdog timer WDTCTL = WDTPW + WDTHOLD; /* --- Set Oscillator Settings ---------------------- */ BCSCTL1 = XT2OFF; // Turn off XT2 oscillator, ACLK = low freq mode/1 BCSCTL1 = CALBC1_1MHZ; // Set DCO to callibrated 1Mhz DCOCTL = CALDCO_1MHZ; // Set DCO to callibrated 1Mhz BCSCTL2 = SELM_0 | DIVM_0 | DIVS_3; // MCLK = DCO/1, SMCLK = MCLK/8 BCSCTL3 = LFXT1S_0 | XCAP_2; // LFXT1 = 32.768khz, 10pF termination IE1 &= ~OFIE; // Disable oscillator fault interrupt /* -------------------------------------------------- */ /* --- Set Timer Settings --------------------------- */ // Timer A clock source = ACLK/1, continuous mode, interrupt enabled TA0CTL = TASSEL_1 | ID_0 | MC_2 | TACLR | TAIE; TACCTL0 = CCIE; // Enable timer A comparator 0 interrupt TACCR0 = 32768; // Set initial comparator value /* -------------------------------------------------- */ /* --- Set Port Settings ---------------------------- */ // Set port direction to output P1DIR = BIT0 | BIT6; // Set initial port values P1OUT = ~(BIT0 | BIT6); /* -------------------------------------------------- */ // Go into low power mode with interrupts enabled _BIS_SR(LPM1_bits + GIE); while(1); } void Timer0_A0(void) __attribute__((interrupt(TIMER0_A0_VECTOR))); void Timer0_A0(void) { // This vector gets called on timer A comparator 0 interrupt P1OUT ^= BIT0; // Toggle LED TACCR0 += 32768; // Add offset to CCR0 TACCTL0 &= ~CCIFG; // Reset the interrupt flag } void Timer0_A1(void) __attribute__((interrupt(TIMER0_A1_VECTOR))); void Timer0_A1(void) { // This vector gets called on timer A overflow and comparators 1 and 2 P1OUT ^= BIT6; // Toggle LED TACTL &= ~TAIFG; // Reset the interrupt flag } |
Platform Common Files
To further our understanding of how things are implemented, we’ll take a look at some of the files that make up the platform. Due to the abstractions, almost all the underlying components for peripherals are identical across a given microcontroller family. As such, many of these files will remain unchanged when we create new platform that utilizes a chip that is part of the family. We’ll take a look at some of the higher level initialization components located in /opt/tinyos/root/tos/platform/msp-common.
|
1 2 3 4 5 6 7 |
configuration PlatformC { provides interface Init; } implementation { components PlatformP, Msp430ClockC; Init = PlatformP; PlatformP.Msp430ClockInit -> Msp430ClockC.Init; } |
Here we have our top-level component for initializing the msp430 platform. All that it does is link together the platform’s private module PlatformP.nc with the clock configuration component. It also provides an Init interface for the Blink program to call.
|
1 2 3 4 5 6 7 8 9 10 11 12 |
interface Init { /** * Initialize this component. Initialization should not assume that * any component is running: init() cannot call any commands besides * those that initialize other components. * * @return SUCCESS if initialized properly, FAIL otherwise. * @see TEP 107: Boot Sequence * */ command error_t init(); } |
The list of possible interfaces that components can use or provide are found in /opt/tinyos/root/tos/interfaces and /opt/tinyos/root/tos/lib/. Here is the Init interface, which simply provides a callable function for initialization.
|
1 2 3 4 5 6 7 8 9 10 11 12 13 14 15 16 |
module PlatformP { provides interface Init; uses { interface Init as Msp430ClockInit; interface Init as LedsInit; } } implementation { command error_t Init.init() { call LedsInit.init(); call Msp430ClockInit.init(); return SUCCESS; } default command error_t LedsInit.init() { return SUCCESS; } } |
The private module PlatformP.nc is where the initialization functions are actually implemented. In this case, when another component calls this component’s Init, it executes the initialization function for both the clock as well as the leds abstraction.
|
1 2 3 4 5 6 7 8 9 10 11 12 13 14 15 16 17 18 19 20 21 22 23 24 25 26 27 28 29 30 31 32 33 34 35 36 37 38 39 40 41 42 43 44 45 46 47 48 49 50 51 52 53 54 55 56 57 58 59 60 61 62 63 64 65 66 67 68 69 70 71 72 73 74 75 76 77 78 79 80 81 82 83 84 85 86 87 88 89 90 91 92 |
module McuSleepC @safe() { provides { interface McuSleep; interface McuPowerState; } uses { interface McuPowerOverride; } } implementation { bool dirty = TRUE; mcu_power_t powerState = MSP430_POWER_ACTIVE; /* Note that the power values are maintained in an order * based on their active components, NOT on their values.*/ // NOTE: This table should be in progmem. const uint16_t msp430PowerBits[MSP430_POWER_LPM4 + 1] = { 0, // ACTIVE SR_CPUOFF, // LPM0 SR_SCG0+SR_CPUOFF, // LPM1 SR_SCG1+SR_CPUOFF, // LPM2 SR_SCG1+SR_SCG0+SR_CPUOFF, // LPM3 SR_SCG1+SR_SCG0+SR_OSCOFF+SR_CPUOFF, // LPM4 }; mcu_power_t getPowerState() { mcu_power_t pState = MSP430_POWER_LPM4; // TimerA, USART0, USART1 check if ((((TACCTL0 & CCIE) || (TACCTL1 & CCIE) #ifdef __MSP430_HAS_TA3__ || (TACCTL2 & CCIE) #endif ) && ((TACTL & TASSEL_3) == TASSEL_2)) #ifdef __MSP430_HAS_UART0__ || ((U0ME & (UTXE0 | URXE0)) && (U0TCTL & SSEL1)) #endif #ifdef __MSP430_HAS_UART1__ || ((U1ME & (UTXE1 | URXE1)) && (U1TCTL & SSEL1)) #endif #ifdef __msp430_have_usart0_with_i2c // registers end in "nr" to prevent nesC race condition detection || ((U0CTLnr & I2CEN) && (I2CTCTLnr & SSEL1) && (I2CDCTLnr & I2CBUSY) && (U0CTLnr & SYNC) && (U0CTLnr & I2C)) #endif ) pState = MSP430_POWER_LPM1; #ifdef __msp430_have_adc12 // ADC12 check, pre-condition: pState != MSP430_POWER_ACTIVE if (ADC12CTL0 & ADC12ON){ if (ADC12CTL1 & ADC12SSEL_2){ // sample or conversion operation with MCLK or SMCLK if (ADC12CTL1 & ADC12SSEL_1) pState = MSP430_POWER_LPM1; else pState = MSP430_POWER_ACTIVE; } else if ((ADC12CTL1 & SHS0) && ((TACTL & TASSEL_3) == TASSEL_2)){ // Timer A is used as sample-and-hold source and SMCLK sources Timer A // (Timer A interrupts are always disabled when it is used by the // ADC subsystem, that's why the Timer check above is not enough) pState = MSP430_POWER_LPM1; } } #endif return pState; } void computePowerState() { powerState = mcombine(getPowerState(), call McuPowerOverride.lowestState()); } async command void McuSleep.sleep() { uint16_t temp; if (dirty) { computePowerState(); //dirty = 0; } temp = msp430PowerBits[powerState] | SR_GIE; __asm__ __volatile__( "bis %0, r2" : : "m" (temp) ); // All of memory may change at this point... asm volatile ("" : : : "memory"); __nesc_disable_interrupt(); } async command void McuPowerState.update() { atomic dirty = 1; } default async command mcu_power_t McuPowerOverride.lowestState() { return MSP430_POWER_LPM4; } } |
The McuSleepC.nc is another important file, as it provides the power management functionality for the microcontroller. While most microcontrollers in the same family use the same oscillator configurations, the registers and sleep states may differ between different families so one should verify that the information in this file is correct.
Platform Specific Files
Aside from the common components, there are a few extra files that define each platform. For each platform specified in /opt/tinyos/root/tos/platforms, a few files must exist for TinyOS to know where to pull files from when compiling.
|
1 2 3 4 5 6 7 8 9 10 11 12 13 14 15 16 17 18 19 20 21 22 23 24 25 26 27 28 29 30 31 32 |
push( @includes, qw( %T/platforms/msp430g2553 %T/platforms/msp430-common %T/chips/msp430-small/msp430g2x53 %T/chips/msp430-small %T/chips/msp430-small/pins %T/chips/msp430-small/timer %T/chips/msp430-small/usci %T/chips/msp430 %T/chips/msp430/pins %T/chips/msp430/timer %T/chips/msp430/x2xxx/usci %T/lib/gpio %T/lib/timer %T/lib/power %T/lib/misc ) ); @opts = qw( -gcc=msp430-gcc -mmcu=msp430g2553 -fnesc-target=msp430 -fnesc-no-debug ); push @opts, "-fnesc-scheduler=TinySchedulerC,TinySchedulerC.TaskBasic,TaskBasic,TaskBasic,runTask,postTask" if !$with_scheduler_flag; |
The .platform file provides the nesC compiler a list of locations from where to look for components and interfaces. Starting from the top, it looks first in the platform folder before going into other folders that hold common components. As such you can always put a component in the platform folder to overwrite any of the common components. Components for the scheduler are also specified here but you’ll rarely be changing them.
The hardware.h file for each platform serves as a location for the user to put extra defines. Such defines can be used for things such as specifying hardware revisions or enabling/disabling hardware functionality (such as I2C master/slave).
|
1 2 3 4 5 6 7 8 9 10 11 12 13 14 15 |
PLATFORM ?= msp430g2553 MSP_MCU = msp430g2553 # Disable MSP430 hardware multiply because it makes MSPGCC die PFLAGS += -mmpy=none -mdisable-watchdog ifndef DEFAULT_PROGRAM DEFAULT_PROGRAM = mspdebug endif $(call TOSMake_include_platform,msp) msp430g2553: $(BUILD_DEPS) @: |
A platform target file must also exist in /opt/tinyos/root/support/make for each platform. This target serves to define the platform, the microcontroller used within the platform, any extra compiler flags, and the program and driver used in programming the microcontroller. A call to TOSMake_include_platform, msp indicates to make that we want it to call msp.rules under /opt/tinyos/root/support/make/msp/ which contains the actual target for producing the binaries for the msp430 line of microcontrollers.
Running Blink on the Value Line Launchpad
Since the msp430g2553 platform is already implemented through TinyOS and the installed extension, we can run the Blink program on the board without having to add or change much of the underlying code. We will have to change some however, as the launchpad board only has two LEDs and the msp430g2553 microcontroller uses 16-bit timers. Note that the launchpad board MUST have a 32.768kHz crystal attached to the X1 oscillator pins. TimerA uses this oscillator for its operation.
First of all we need to change PlatformLed.h in /opt/tinyos/root/tos/platforms/msp430-common/ to support more than one output LED. Within the header file, change the code to the following to define the second LED on pin 1.6:
|
1 2 3 4 5 6 7 8 9 10 11 12 13 14 15 |
#ifdef __LAUNCHPAD__ #ifdef __MSP430G2553 #define PORT_LED0 Port10 // RED #define PORT_LED1 Port16 // GREEN #define PLATFORM_LED_COUNT 2 #endif #else #define PORT_LED0 Port10 //RED #define PLATFORM_LED_COUNT 1 #endif #define PLATFORM_LED_RED 0 // LED1 #define PLATFORM_LED_GREEN 0 // LED2 |
Then in BlinkAppC.nc, remove the Timer2 declaration and bindings and add the following above the configuration to let the compiler know that this device is running on the value line launchpad board:
|
1 |
#define __LAUNCHPAD__ |
Finally, in BlinkC.nc, remove the references to Timer2. Once you have done this, you can program the board:
|
1 |
make msp430g2553 install |
If everything goes well, you should see the red LED toggle four times a second and the green LED twice every second. If you truly wanted to match the hardware, you should change TimerMilliC() to Timer16MilliC() in BlinkAppC.nc, Timer<TMilli> to Timer16<TMilli> in BlinkC.nc, and the include from “Timer.h” to “Timer16.h” in BlinkC.nc. This is due to the hardware timers on the device being 16-bits in length, rather than the standard 8-bits. The normal 8-bit timer abstractions still work however, due to the way TinyOS is structured.
Creating the MSP430F5529 Platform
Now that we’ve gone over the basics for TinyOS, lets create a new platform for the MSP430F5529 launchpad. While we are still going to be using the library extension, it would make things easier if we used stow to isolate the TinyOS code base, the extension, and the code that we’re going to be adding. First download the file here and run the following to extract it into /opt/tinyos/sources/:
|
1 |
tar -C /opt/tinyos/sources/ -xf tinyos-msp430-large.tar |
There should now be a tinyos-msp430-large folder in /opt/tinyos/sources, which should have two folders (support and tos) in it. Then run the following to combine the three folders in /opt/tinyos/sources into /opt/tinyos/root:
|
1 2 3 4 5 6 7 8 9 10 |
cd /opt/tinyos/sources/ rm stow/* stow -D -t /opt/tinyos/root * rm -r /opt/tinyos/root/* mv tinyos-msp430/ tinyos-msp430-small/ ln -s /opt/tinyos/sources/tinyos-2.1.2/ stow/ ln -s /opt/tinyos/sources/tinyos-msp430-small/ stow/ ln -s /opt/tinyos/sources/tinyos-msp430-large/ stow/ cd /opt/tinyos/sources/stow/ stow -S -t /opt/tinyos/root/ * |
Before we try programming the new device, lets go over some of the files that I’ve added.
In /opt/tinyos/sources/tinyos-msp430-large/tos/chips, I created a new msp430-large folder that puts in support for the MSP430F5xxx family of microcontrollers. Please note that the components in this folder are incomplete and may not work with all features and peripherals on the device. The only components that I’ve verified to be working are McuSleepC.nc as well as the basic timer code.
|
1 2 3 4 5 6 7 8 9 10 11 12 13 14 15 16 17 18 19 20 21 22 23 24 25 26 27 28 29 30 31 32 33 |
push( @includes, qw( %T/platforms/msp430f5529 %T/platforms/msp430-common %T/chips/msp430-large/msp430f5xxx %T/chips/msp430-large %T/chips/msp430-large/pins %T/chips/msp430-large/timer %T/chips/msp430-large/usci %T/chips/msp430 %T/chips/msp430/pins %T/chips/msp430/timer %T/chips/msp430/x5xxx/usci %T/lib/gpio %T/lib/timer %T/lib/power %T/lib/misc ) ); @opts = qw( -gcc=msp430-gcc -mmcu=msp430f5529 -fnesc-target=msp430 -fnesc-no-debug ); push @opts, "-fnesc-scheduler=TinySchedulerC,TinySchedulerC.TaskBasic,TaskBasic,TaskBasic,runTask,postTask" if !$with_scheduler_flag; |
In /opt/tinyos/sources/tinyos-msp430-large/tos/platforms, I created a new msp430f5529 platform for the higher end device. This platform implements a different .platform file that tries to grab components from the msp430-large folder rather than from the msp430-small folder of the other devices.
|
1 2 3 4 5 6 7 8 9 10 11 12 13 14 15 16 |
PLATFORM ?= msp430f5529 MSP_MCU = msp430f5529 # Disable MSP430 hardware multiply because it makes MSPGCC die PFLAGS += -mmpy=none -mdisable-watchdog ifndef DEFAULT_PROGRAM DEFAULT_PROGRAM = mspdebug MSPDEBUG_DRIVER = tilib endif $(call TOSMake_include_platform,msp) msp430f5529: $(BUILD_DEPS) @: |
In /opt/tinyos/sources/tinyos-msp430-large/support/make, I created a msp430f5529.target file so that make knows how to run the compiler. In addition to the change in the targeted device, the mspdebug driver is also specified so that the utility calls the right one (tilib) for the emulator rather than the default (rf2500).
Running Blink on the High End Launchpad
Before we can interface to the LEDs, we need to change PlatformLed.h to support the new board. Within the header file in /opt/tinyos/root/tos/platforms/msp430-common/, change the code to define the second LED on pin 4.7:
|
1 2 3 4 5 6 7 8 9 10 11 12 13 14 15 16 17 18 19 20 21 |
#ifdef __LAUNCHPAD__ #ifdef __MSP430G2553 #define PORT_LED0 Port10 // RED #define PORT_LED1 Port16 // GREEN #define PLATFORM_LED_COUNT 2 #endif #ifdef __MSP430F5529 #define PORT_LED0 Port10 // RED #define PORT_LED1 Port47 // Green #define PLATFORM_LED_COUNT 2 #endif #else #define PORT_LED0 Port10 //RED #define PLATFORM_LED_COUNT 1 #endif #define PLATFORM_LED_RED 0 // LED1 #define PLATFORM_LED_GREEN 0 // LED2 |
Once we’ve done this, we should be able to program the Blink program onto the launchpad board:
|
1 |
make msp430f5529 install |
Note that due to the layers of abstractions, we didn’t have to change anything in the code prior to running the program on a different device.
Blink on the Msp430F5529 without TinyOS
As a final note, lets look at what the Blink program looks like on the higher end launchpad if TinyOS wasn’t used.
|
1 2 3 4 5 6 7 8 9 10 11 12 13 14 15 16 17 18 19 20 21 22 23 24 25 26 27 28 29 30 31 32 33 34 35 36 37 38 39 40 41 42 43 44 45 46 47 48 49 50 51 52 53 54 55 56 57 58 59 |
#include <msp430.h> int main(void) { // Disable watchdog timer WDTCTL = WDTPW + WDTHOLD; /* --- Set Oscillator Settings ---------------------- */ // DCOCLK = FLLD * (FLLN + 1) * (FLLREFCLK / FLLREFDIV) // DCOCLKDIV = (FLLN + 1) * (FLLREFCLK / FLLREFDIV) // Pins: XT1 = 32khz (ext), XT2 = 4mhz (ext) P5SEL |= (BIT2 | BIT3); // Use P5.2 and P5.3 as XT2 pins UCSCTL0 = DCO4 | DCO3; // DCO = 24 (~1Mhz) UCSCTL1 = DCORSEL_1; // DCORSEL = 1 UCSCTL2 = FLLD_0 | FLLN0; // FLLD = 1 and FLLN = 1 UCSCTL3 = SELREF_5 | FLLREFDIV_4; // FLL = XT2CLK and FLLREFDIV = 8 UCSCTL4 = SELA_0 | SELS_3 | SELM_3; // ACLK = XT1CLK, SMCLK = MCLK = DCOCLK UCSCTL5 = DIVA_0 | DIVS_0 | DIVM_0; // ACLK/1, SMCLK/1, MCLK/1 UCSCTL6 = XCAP_3 | SMCLKOFF; // Set XT1 cap to ~9pF, SMCLK off //UCSCTL7 = // Fault flags (ignore) //UCSCTL8 = // Clock requests enabled //UCSCTL9 = // Bypass swing level (ignore) SFRIE1 &= ~OFIE; // Disable oscillator fault interrupt /* -------------------------------------------------- */ /* --- Set Timer Settings --------------------------- */ // Timer A0 source = ACLK/1, continuous mode, interrupt enable TA0CTL = TASSEL_1 | ID_0 | MC_2 | TACLR | TAIE; TA0CCTL0 = CCIE; TA0CCR0 = 32768; /* -------------------------------------------------- */ /* --- Set Port Settings ---------------------------- */ P1DIR = BIT0; P4DIR = BIT7; //P1OUT = ~BIT0 & 0xF; //P4OUT = ~BIT7 & 0xF; /* -------------------------------------------------- */ // Go into low power mode with interrupts enabled _BIS_SR(GIE); //_BIS_SR(LPM1_bits + GIE); while(1); } void Timer0_A0(void) __attribute__((interrupt(TIMER0_A0_VECTOR))); void Timer0_A0(void) { // This vector gets called on timer A comparator 0 interrupt P1OUT ^= BIT0; // Toggle LED TA0CCR0 += 32768; // Add offset to CCR0 TA0CCTL0 &= ~CCIFG; // Reset the interrupt flag } void Timer0_A1(void) __attribute__((interrupt(TIMER0_A1_VECTOR))); void Timer0_A1(void) { // This vector gets called on timer A overflow and comparators 1-4 P4OUT ^= BIT7; // Toggle LED TA0CTL &= ~TAIFG; // Reset the interrupt flag } |
Other Resources
TinyOS wiki: http://tinyos.stanford.edu/tinyos-wiki/index.php/Main_Page
List of TEPs: http://tinyos.stanford.edu/tinyos-wiki/index.php/TEPs
TinyOS Tutorials: http://tinyos.stanford.edu/tinyos-wiki/index.php/TinyOS_Tutorials
TinyOS Programming Manual: http://csl.stanford.edu/~pal/pubs/tos-programming-web.pdf